Today, we started an exciting tradition in our house – Good Friday Hot Cross Bun making and eating! I’ve always found Hot Cross Buns too scary to try on our restrictive diets, but this year I was brave (while holding my breath that it would all turn out and be delicious). I took inspiration from several recipes, tweaked, re-adjusted and came up with a final working mixture. I have just sat down and had a bun myself with a nice cup of green tea, and it was all I’d hoped it would be to get our annual Good Friday Hot Cross Bun bake session off to a great start. I have written the ingredients list using grams so that either the regular method or Thermomix method can be used.
Hot Cross Buns
Ingredients:
Dough
- 310 g warm water
- 1 Tb yeast
- 1 tsp honey (can use golden syrup, rice syrup or maple syrup)
- 2 Tb honey (can use golden syrup, rice syrup or maple syrup)
- 270 g white rice flour
- 120 g brown rice flour
- 120 g tapioca/arrowroot flour
- 1.5 tsp guar gum
- 1 tsp salt
- 3 Tb sunflower oil (your choice of oil)
Crosses
- 1/4 cup white rice flour
- 1/4 cup water
Glaze
- 1/4 cup sugar (or honey, maple syrup golden syrup, or rice syrup)
- 1/4 cup water
Method:
- I pre-heat oven to 150 degrees then turn off (ready for dough to rise in a nice warm place)
- Oil a square cake tin
- Combine warm water, yeast and 1 tsp honey and let the yeast froth up (set aside about 10min)
- Meanwhile, measure the dry ingredients into a large mixing bowl and stir to combine together.
- Mix the crosses mixture together. I placed this in a zip-lock bag ready to pipe when ready
- When yeast has frothed, add the 2 Tbs honey and the sunflower oil into the yeast and water mixture.
- Then pour the wet mixture into the dry mixture, stir until combined.
- Turn out onto a floured mat or chopping board to knead (I use white rice flour to flour the board)
- Knead the dough until it has combined nicely, I add extra rice flour to get it to a nice dough consistency.
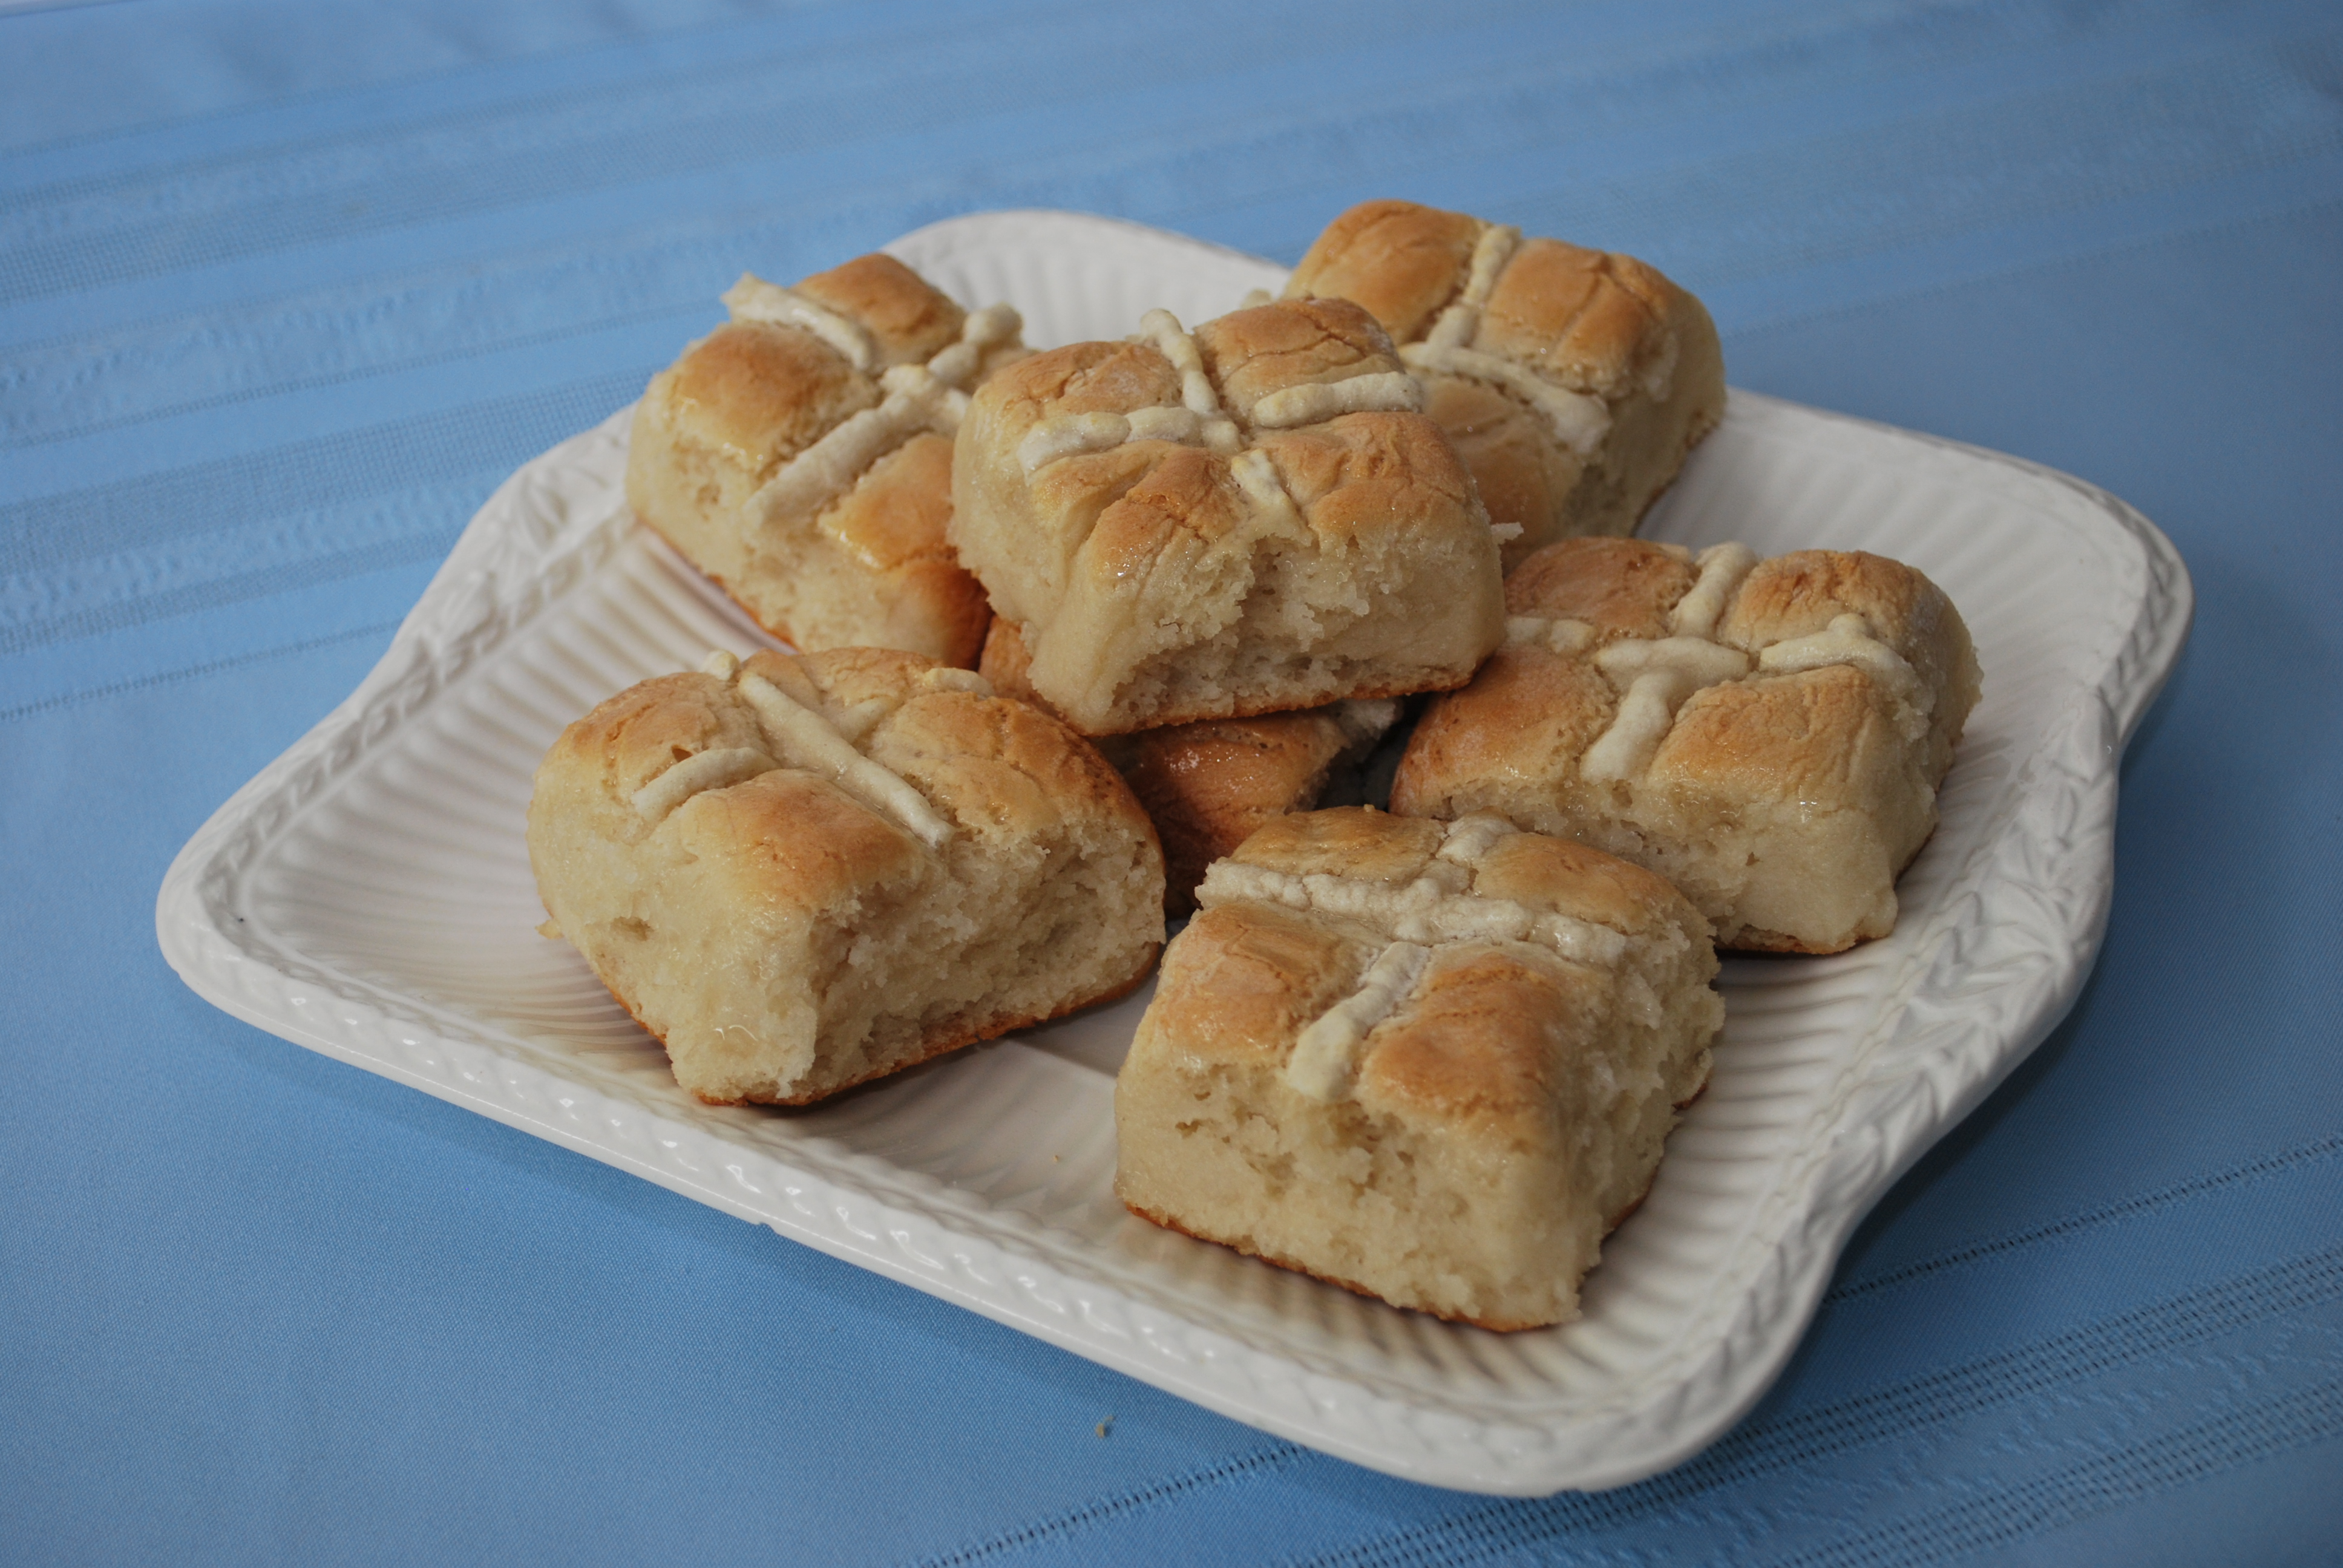
- Roll into balls (I made 9 buns that I laid side by side in the square tin, then pressed down gently)
- Pipe a cross on each bun (I cut a small amount of the corner of the zip-lock bag and used it to pipe with)
- Place in the pre-warmed oven to rise until the balls have doubled
- Bake on 200 degrees for 40 minutes
- Make sugar glaze up when there is 10 minutes baking time left. To make glaze, place ingredients in a small saucepan, bring to the boil (while stirring), then reduce to simmer for 5 minutes
- Cool on wire rack. Glaze while still hot. Once cooled enough to pull apart into buns, you can glazed the sides of each bun too for extra sweetness!
Thermomix Method:
- I pre-heat oven to 150 degrees then turn off (ready for dough to rise in a nice warm place)
- Oil a square cake tin
- You can grind your rice into flour or use flour you have already ground. To grind flour place brown and white rice into the bowl for 1 minute on speed 9. Set flour aside.
- Place water and the 1 tsp of honey into the bowl. Combine at 37 degrees, speed 1 for 5 minutes to heat the water
- Add the yeast, mix on speed 1 for 30 seconds.
- Leave 10 minutes for the yeast to proof and froth up
- Add the oil and the 2 Tb of honey, then place all dry ingredients into the bowl. Mix on speed 1 for 20 seconds, scrap down and repeat
- Knead with closed lid for 2 minutes
- Turn out onto a floured mat or chopping board (I use white rice flour to flour the board)
- I sprinkled the dough with flour and gave it a quick knead
- Roll into balls (I made 9 buns that I laid side by side in the square tin, then pressed down gently)
- Pipe a cross on each bun (I cut a small amount of the corner of the zip-lock bag and used it to pipe with)
- Place in the pre-warmed oven to rise until the balls have doubled
- Bake on 200 degrees for 40 minutes
- Make sugar glaze up when there is 10 minutes baking time left. To make glaze, place ingredients in a small saucepan, bring to the boil (while stirring), then reduce to simmer for 5 minutes
- Cool on wire rack. Glaze while still hot. Once cooled enough to pull apart into buns, you can glazed the sides of each bun too for extra sweetness!
This recipe is very pure in its ingredients as my children are very sensitive. However, I am hoping to try and make a more adult version of this recipe tomorrow (for us grown ups who are less sensitive). I will be adding a sprinkle of mixed spice and some chopped up mixed dried fruit.
If you give this recipe a try please let me know how it turns out, I’m happy to troubleshoot or discuss how you could substitute these ingredients if some of the ones I’ve used aren’t suitable to your family’s sensitivities. For example, if your family doesn’t tolerate rice, then other flours could be tried, such as: millet, sorghum or quinoa. If the arrowroot isn’t suitable, another starchy flour is potato.